A Pole Bean Trellis
Can Be a Glorious Thing
A Pole bean trellis can dramatically increase your bean yield per sq m of garden space and do it gloriously by having the
beans share their trellis with some Heavenly Blue Morning Glories.
There is no truer blue in the garden than this
old favourite and it shares its space with the pole beans quite happily. I create that space by building a simple Pole Bean trellis that uses a bit of wood and a lot of jute string. The jute string is important because it will compost and doesn’t need to be separated from the vines in the fall. This simple structure uses a space in the garden that is about 40 cm square. (16")
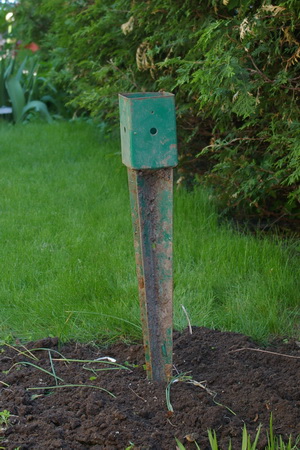
How Do I Hold It Up? A
Metpost spike that you drive into the ground where you want the trellis to be. Available at most building supply stores in the fencing department. I put a short piece of wooden 4x4 into the post and hammer on that. If you hammer on the post itself you can easily bend the lip and make it difficult to insert the trellis centrepost.
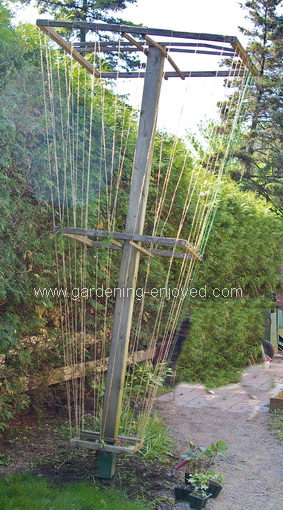
Now For The Trellis Structure! Use an 8' length of pressure treated 4x4 for the centrepost. Now you want a cedar 2x8 and a table saw to cut it up. Cut into long square strips that are the width of the 2x8. We all know that’s not 2". Make 4 pieces about 12" long with the ends cut at 45̊ so that you can construct a square. Make another square about 24" in size and a third one about 36". Now make several lengths of that cedar about 1" sq. These attach to the centrepost to hold the three squares in place. The picture should make this obvious.
How Do I Attach the Jute String? This will seem slightly expensive but it is worth it in the long run. Buy a package of 11/4" brass screws. Screw them into the three squares that you made. Put about 2/3s of the screw into the wood and leave a third sticking out to attach the string onto. Put three on each side of the small square and six on each side of the two larger squares. Using the 1” sq strips attach the three squares to the centrepost. The large one at the very top the mid-size one in the middle and the small one near the bottom, leaving enough 4x4 below it to fit into the bracket on the Metpost. Once it is all assembled attach the string starting on the top square. Do this while it is laying on the ground so that you don’t need a ladder to do it. Once it is all strung, gently, pick it up and insert it into the Metpost that you have already driven into the soil.
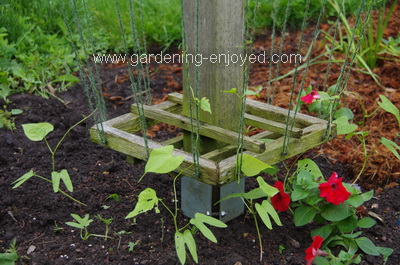
Let’s Plant the Pole Bean Trellis! You can start the Morning Glories and Beans 2 - 3 weeks before planting out if you have room under your lights to do so. Don’t start them any earlier or they will wind around themselves and become a nightmare to untangle. You can also successfully direct seed around the base of the Pole Bean Trellis once the soil has warmed and the threat of frost is passed. I put 2 - 3 plants of each type on each of the four sides. When they are long enough you may need to start winding them around the string. Once started they will take off and do the rest on their own.
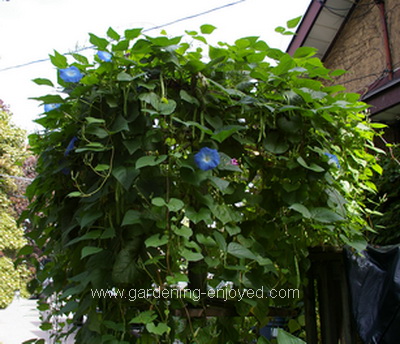
What’s Next? Stand back and watch them grow at an amazing pace. Admire the blue flowers every morning and pick some beans for dinner. You will quickly see why you made the Pole Bean trellis wider at the top. Both plants will branch and weave around each other to create a mass of flowers, foliage and fruit as they approach the top. Keep the beans picked regularly and they will continue to produce. In the fall you can let the last of the bean pods dry and then collect the
dried beans to use for soups or baked beans. The Morning Glories will force you go outside and enjoy them because they make poor cut flowers.
Return from Pole Bean Trellis to the vegetables main page