|
Hosta Propagation
|

When Can I Do It? That’s one of the joys of Hosta propagation, it really isn’t that fussy about the time of year. It probably works best if done in the spring when the shoots are first appearing but I have done it mid-summer with full grown plants and the resulting divisions hardly wilt at all. It is one of those wonderful gardening chores that you can do whenever you want to do it.

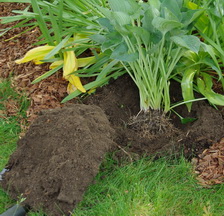
How Simple Is It? Insert, possibly by jumping on it, a heavy sharp shovel just under the outer reach of the leaves. Do this all around the plant and on the last insertion lean back on the shovel and the solid root mass will usually pop right out of the soil. If you just want to move it, then carry this whole thing to the new location and plant it at the same depth.

How Many Divisions Can I Make? That obviously depends on the size of the plant that has been dug up. If you work your fingers through the leaf stalks where they emerge from the soil you should be able to see some natural divisions. The leaves will be in discrete clumps and you can just divide around them rather than through them. For the most successful Hosta propagation you should have a division that has 3 - 4 of these clumps of leaves. Obviously, the bigger the division the quicker the new plant will reach its mature size.
 What Do I Do With The Divisions? The short answer is, plant them. Add some good compost to an area about three time the size of the clump’s root structure and work it into the soil. In this prepared soil dig a hole big enough to allow all of the roots to spread out and then backfill the hole working the soil between the roots. The new soil line should be just above the old soil line. Pack the soil firmly enough to hold the plant solidly upright but remember you are not making concrete here.
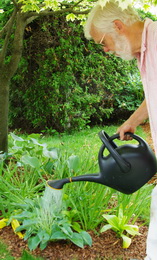
Now What? Organize the soil so that there is a saucer shape around the area where the roots are now located. This saucer is going to catch the water that you are about to apply so that there is enough to penetrate to the bottom of the hole thus wetting all of the roots. I like to put some transplant fertilizer into that initial watering. If the results of your Hosta propagation start to wilt slightly in the next few days, fill that saucer with water again. They should become self sufficient after a couple of weeks and two or three waterings or good rainfalls.
That’s all there is to it. They will sit there and look happy for the rest of the summer and then come back noticeably bigger next spring. You can usually make a few friends happy by giving them the extra pieces from your Hosta propagation exercise.
